On this page
Most AI writing tutorials skip the part where the output is actually useful. Type a prompt, get a draft, spend an hour fixing it — that's not a workflow, that's a first-pass generator. The structured approach is different: you build the piece in stages, each one small enough to review and correct before moving forward.
This walkthrough covers the full ImpressWriter workflow from start to finish — not a feature list, but the actual sequence of decisions that produces a piece worth publishing. Everything here runs on the free plan. For deeper context on the structure behind this process, read why outline-first AI content beats one-shot drafting.
The example we'll follow
Every step in this walkthrough uses a single concrete example: a blog post titled "How to build a weekly email newsletter your readers actually open." Same topic, same decisions, all the way through to publishing. Concrete examples make it much easier to see where each step matters — and where it's tempting to rush.
Set up the Scenario and outline
Step 1 — Fill in the Scenario form
ImpressWriter calls its content templates Scenarios. Select Blog Post from the library and you'll see four fields: topic, target audience, tone, and target length. These aren't optional decoration — they're the brief that shapes everything downstream.
The most common mistake is being vague. "Email marketing" produces a generic piece. "How to build a weekly email newsletter for a B2B SaaS product with fewer than 1,000 subscribers" produces something specific enough to be useful. Same principle applies to audience: "marketers" tells the AI very little. "Marketing managers at small companies trying to build a content habit from scratch" gives it something concrete to calibrate against.
Tone is the third decision that actually changes the output — not just in phrasing, but in structure, assumed knowledge, and how claims are supported. "Conversational and accessible" produces a different article than "Expert thought leadership." The right choice depends on what your readers expect from you, not what sounds most impressive.
If none of the preset Scenarios fit what you're writing, the Custom Scenario covers any format: describe the content type, topic, and audience from scratch, and the same structured workflow applies.
Step 2 — Review the outline before writing a word
Once you submit the Scenario, ImpressWriter generates a structured outline: section headings and a brief description of what each one covers, in a suggested order. Don't skip this step.
The outline is where the piece is actually designed. Every decision you make here — adding a section, cutting one, reordering two that are in the wrong sequence — saves a significant amount of editing later. A section in the wrong place in the outline produces 300 words in the wrong place in the draft. Fixing it before writing starts is free. Fixing it after takes time.
Three questions to ask at outline stage:
- Is the section order logical for someone reading this for the first time, or does it assume context they won't have yet?
- Does any section feel too broad to cover meaningfully within the target length?
- Is the article going where you actually intended, or did the AI take an adjacent angle?
Edit now. This is ImpressWriter's core philosophy — structure first, prose second. One-shot generation skips this stage entirely, and the editing tax you pay for that shortcut is almost always higher than the time you saved generating. This is the same principle behind outline-first AI content workflows: make structure visible before prose makes problems harder to move.
Draft and calibrate the piece
Step 3 — Draft section by section
With the outline confirmed, you draft one section at a time — not the whole post. One section, review it, move to the next.
There are two reasons this matters. First, you can catch problems early. A section that misses the point, over-explains, or drifts off-topic is fixable when it's 300 words, not when it's embedded in a 2,000-word draft. Second, each section you generate becomes context for the next one. The AI uses what's already been written to keep references consistent, build on established points, and avoid repeating itself — coherence that a one-shot generation fundamentally can't replicate.
For the newsletter post: draft the introduction, read it, confirm the angle is right and the assumed knowledge level matches your audience. Then draft the first body section. Does it follow naturally from the intro? Is it going where the outline promised? Move to the next section only when you're satisfied.
The pace feels slower than dumping everything at once. The editing time at the end is dramatically shorter.
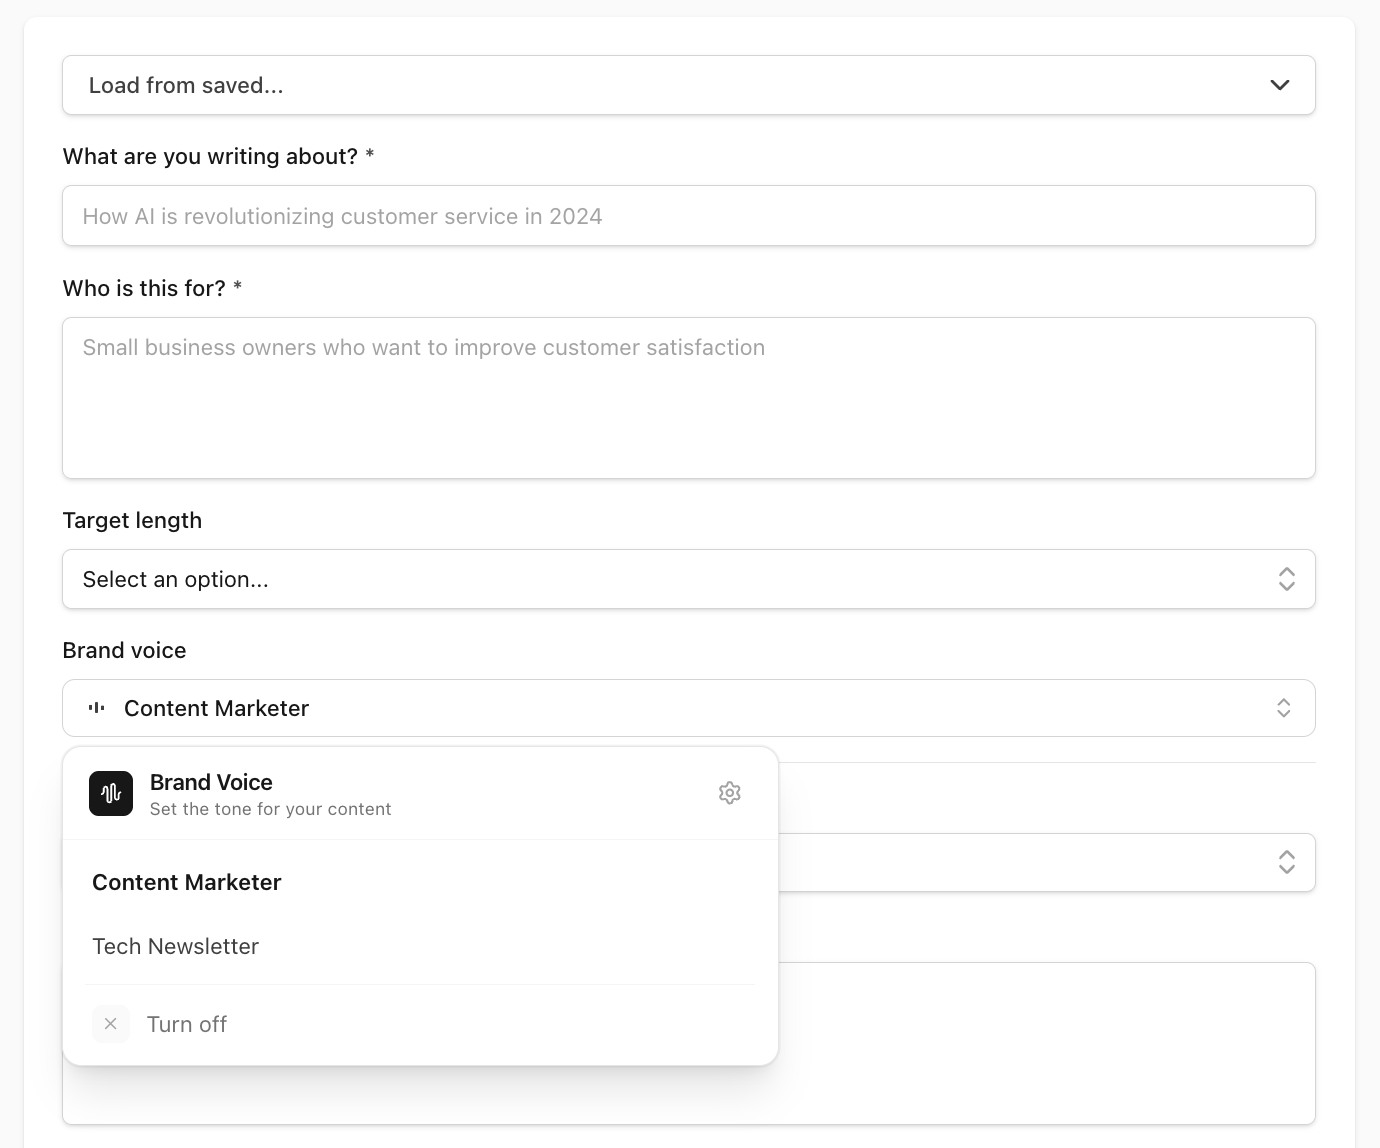
Step 4 — Apply your brand voice
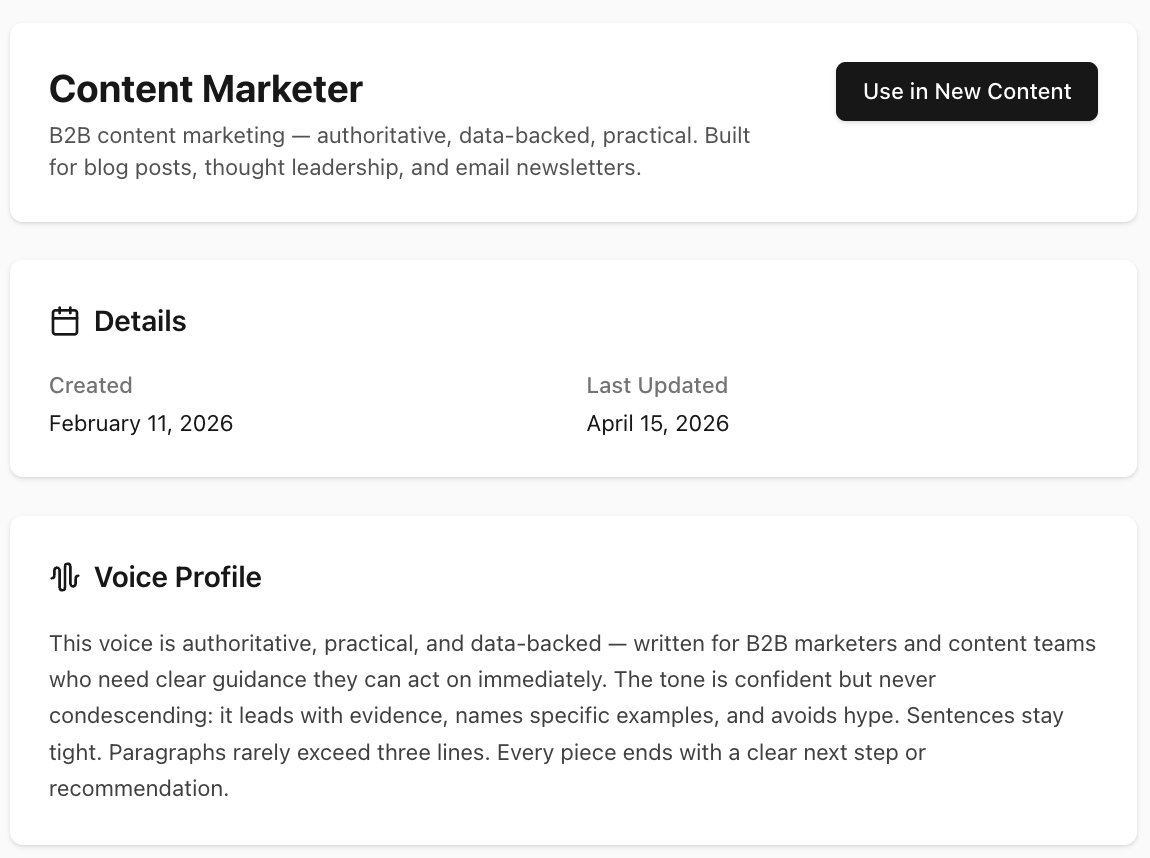
Before you consider the draft final, filter it through a Brand Voice Profile.
A voice profile is built once from your existing writing samples — a few blog posts or articles that represent your best work in the format you're producing. ImpressWriter analyses them and extracts the patterns that make your writing sound like you: sentence rhythm, vocabulary register, rhetorical habits, punctuation choices. Once built, the profile lives in your library and applies to every draft you create.
The practical difference is significant. The same paragraph drafted without a voice profile reads competently but generically — the kind of prose that could have come from any AI tool. With a profile applied, the sentence structure matches your natural phrasing, the vocabulary fits the register your readers expect, and the tone is consistent with everything else you've published.
Write your first draft free — no credit card needed
ImpressWriter's free plan includes the full structured workflow, one brand voice profile, and the built-in Minis. Everything in this walkthrough, at no cost.
Brand voice selection is built into the Scenario form — you choose a profile before drafting begins, and it shapes every section from start to finish. It isn't applied once as a system-prompt prefix and then forgotten. It's woven into the generation instructions at each stage of the workflow, which is why the consistency holds through a full article in a way that a single injected prompt typically doesn't.
The free plan includes one brand voice profile — enough to get started. If you haven't built one yet, do it before finishing this draft. Upload three to five of your best existing pieces, review the generated profile, and you'll have a reusable voice asset that improves every piece you write from here forward. For a fuller walkthrough, see how to train AI to write in your brand voice.
Polish and publish
Step 5 — Polish with Minis
Minis are one-shot AI tools for specific editing tasks. Two of them belong at the end of every blog post draft.
Proofreader
Paste in the full draft and get a grammar and clarity pass back. Not a spellchecker — it catches sentence-level issues: clunky constructions, redundant phrases, missing transitions, and pronoun ambiguity. One input, one output, done.
Rewriter
For the specific paragraphs that still feel off after a full draft pass. Rather than regenerating the whole section, paste in the problem paragraph and get an alternative version back. Everything around it stays untouched.
Both are available on the free plan. Pro users can also create custom Minis — your own one-shot tools for recurring tasks like "convert this section to a LinkedIn post," "rewrite this for a less technical audience," or "summarise this into three bullet points."
Step 6 — Publish directly from ImpressWriter
The draft is done. Publish it without copy-pasting into a CMS. ImpressWriter supports two native publishing paths.
GitHub
Choose the repository, directory path, and filename. Add YAML front matter if your
site needs it — ImpressWriter supports template variables like
{{title}}, {{date}}, and {{datetime}} so the
metadata populates automatically on each publish. Hit publish, and ImpressWriter
creates a pull request with the content. Your normal review workflow takes over from
there — nothing goes live without a merge.
This path is right for developers, technical writers, and anyone publishing through a Jamstack site or docs-as-code workflow. The PR-based approach keeps your editorial history in git and enforces review before anything goes live. You can connect this from the ImpressWriter integrations workflow and keep publishing inside the same review process your team already uses.
Google Drive
Choose a folder, set the filename, and pick the output format — Google Doc or Markdown. Hit publish, and the file appears in Drive immediately, ready for any additional review or collaboration before going live.
This path is right for editors and marketing teams whose review process lives in Docs before content moves to a CMS or goes live.
The important detail is that publishing is still part of the workflow, not a disconnected handoff. The same draft that was structured, reviewed section by section, tuned to your voice, and polished with Minis is the draft you send to the next system. That reduces the accidental drift that happens when you copy from one tool to another, reformat headings, rebuild metadata, or paste into a blank document before review.
The full workflow
Six steps, start to finish:
- Choose a Scenario and fill in the brief with specific, concrete details — topic, audience, tone, and length.
- Review the AI-generated outline — reorder, cut, or rename sections before any prose is written.
- Draft one section at a time, reviewing each before moving to the next.
- Apply a Brand Voice Profile to align the output with your established tone and phrasing.
- Run the Proofreader Mini for a grammar and clarity pass on the full draft.
- Publish to GitHub or Google Drive directly from ImpressWriter — no copy-pasting required.
Publishing-ready checkpoint
Structure
Every section answers a clear reader question.
Voice
Tone and phrasing match the rest of your published work.
Publish
The destination, filename, and review path are ready before export.
Before you publish, read the post once as a first-time visitor. The question is not "does this sound polished?" but "does each section earn the next one?" If the intro promises a practical workflow, every heading should move that workflow forward. If a section only repeats the premise, cut it. If a section introduces a new idea that deserves more room, promote it in the outline and draft it deliberately. This final pass is also where SEO and E-E-A-T overlap: useful structure, visible human review, and specific examples give readers more confidence than a generic AI-generated article with perfect grammar.
Conclusion
The structured workflow isn't about writing slower. It's about making a series of small, reviewable decisions instead of one large, unreviewable one. The outline stage catches structural problems before they become prose problems. Section-by-section drafting catches directional errors before they compound across the whole piece. Brand voice makes consistency automatic rather than an editing round at the end.
The blank page problem isn't solved by generating faster. It's solved by knowing exactly what the next step is — and having a workflow that keeps each step small enough to get right.
The free plan covers every step in this walkthrough. Start there, build your first voice profile, and run through it once. The second time is noticeably faster than the first.